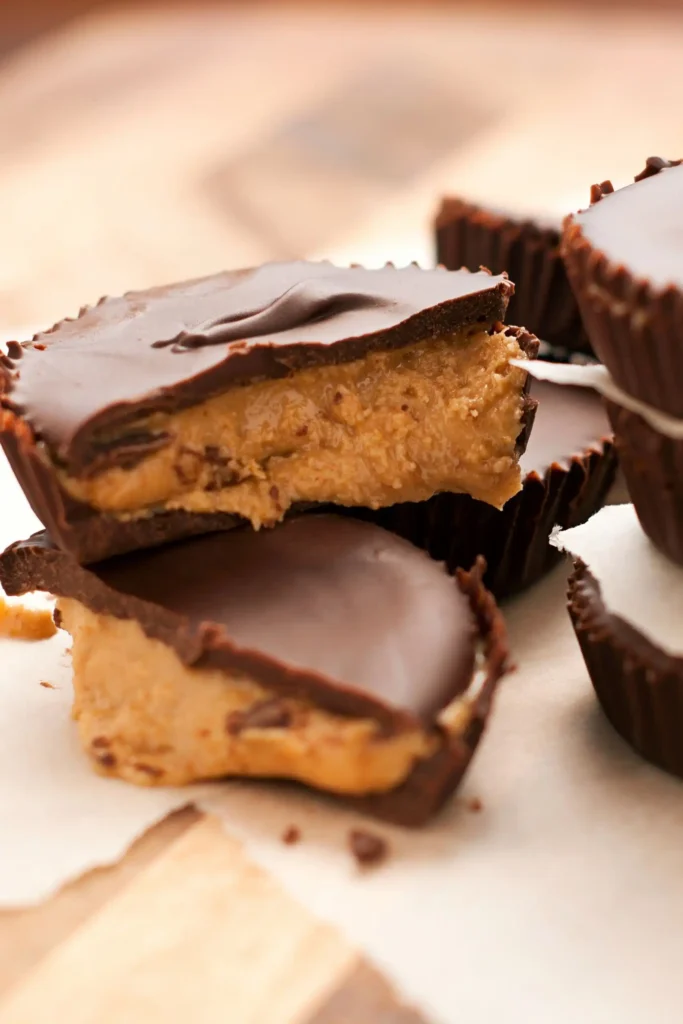
No Bake Chocolate Peanut Butter Cups are one of those desserts that strike the perfect balance between simplicity and indulgence. They bring together smooth peanut butter, rich layers of chocolate, and just the right amount of sweetness in every bite. The best part is that they require no oven, which makes them an easy treat for busy days, last-minute gatherings, or whenever the craving for something homemade and satisfying strikes.
These homemade cups are made with pantry-friendly ingredients like peanut butter, butter, chocolate chips, and powdered sugar, which makes them both accessible and budget-friendly. They’re ready in under an hour with minimal effort, and because they’re chilled instead of baked, the texture is perfectly creamy in the middle with a crisp chocolate shell on the outside. Whether you want a quick snack, a treat to serve friends, or a dessert to store for later, this recipe is a dependable go-to.
Why You’ll Love These Cups
- Quick to prepare: With no baking involved, you can prepare a full batch in about 20 minutes, then let the freezer do the rest.
- Simple ingredients: All you need are common staples that are easy to find and usually already in your kitchen.
- Customizable: They work well with different chocolate types, from dark to milk, and you can even substitute almond or cashew butter if you want a variation.
- Better than store-bought: These cups are fresher, richer, and free from unnecessary additives, making them a healthier choice without losing flavor.
- Great for storing: They keep well in the refrigerator or freezer, which means you can always have a sweet snack on hand.
- Crowd-pleasing treat: Perfect for sharing at parties, gifting, or simply keeping for yourself when you want something quick and satisfying.
Ingredients Needed
To make these no bake chocolate peanut butter cups, you’ll need simple pantry staples. Each ingredient plays a role in creating the perfect taste and texture, so here’s what you’ll use:
- 1 cup smooth peanut butter – Creamy peanut butter works best for a smooth and soft filling. Natural peanut butter can be used, but you may need to adjust the sugar since it’s less sweet.
- 1/4 cup unsalted butter, melted – Adds richness to the filling and helps it hold together. Using unsalted butter gives you control over the flavor balance.
- 1/4 cup brown sugar – Provides a light caramel-like sweetness that deepens the flavor of the peanut butter layer.
- 1 cup powdered sugar, sifted – Makes the filling firm while keeping it smooth. Sifting prevents clumps and helps everything mix evenly.
- 2 cups semi-sweet chocolate chips – These create the chocolate shell. Semi-sweet chips balance sweetness and richness, but you can also use dark or milk chocolate depending on your taste.
- 1 tablespoon coconut oil – Helps the chocolate melt smoothly and set with a glossy finish. If you don’t have coconut oil, you can substitute with a small amount of butter or shortening.
This recipe yields about 12 peanut butter cups, but you can easily double it if you want a larger batch.
Step-by-Step Instructions
Follow these detailed steps to make perfect homemade chocolate peanut butter cups:
Step 1: Make the Peanut Butter Filling
- In a medium saucepan, add peanut butter, melted butter, and brown sugar.
- Heat on low, stirring continuously until the mixture is smooth and the sugar has dissolved (about 2–3 minutes).
- Remove from heat and stir in the sifted powdered sugar until well combined. The mixture should be thick but spreadable.
- Set the filling aside to cool slightly while you prepare the chocolate.
Step 2: Melt the Chocolate
- In a microwave-safe bowl, combine chocolate chips and coconut oil.
- Heat in 30-second intervals, stirring after each round, until fully melted and silky smooth. This usually takes 1–2 minutes total.
- Be careful not to overheat the chocolate, as it can burn quickly.
Step 3: Prepare the Muffin Pan
- Line a 12-cup muffin tin with paper cupcake liners. This makes it easy to remove the cups once they’re set.
- Spoon about 1 tablespoon of melted chocolate into each liner.
- Use the back of the spoon to spread the chocolate evenly across the bottom.
- Place the tray in the freezer for 10 minutes to allow the base layer to firm up.
Step 4: Add the Peanut Butter Layer
- Once the bottom chocolate layer is firm, take the tray out of the freezer.
- Add about 1 tablespoon of the peanut butter filling to each cup.
- Gently flatten the filling with the back of the spoon so it spreads evenly without touching the edges.
Step 5: Seal with More Chocolate
- Spoon another tablespoon of melted chocolate over each peanut butter layer.
- Make sure the filling is completely covered and sealed inside.
- Tap the muffin tray lightly on the counter to smooth out the tops and remove any air bubbles.
Step 6: Chill Until Firm
- Place the muffin tray back into the freezer or refrigerator.
- Let the peanut butter cups set for 30–40 minutes until completely firm.
- Once chilled, peel away the paper liners and enjoy.
Recipe Tips
- Store in the refrigerator for up to 2 weeks in an airtight container.
- Freeze for up to 2 months for a longer shelf life.
- Use dark chocolate chips if you prefer a richer, less sweet version.
- Add a pinch of sea salt on top for a sweet-and-salty twist.

No-Bake Chocolate Peanut Butter Cups Recipe
Description
These No Bake Chocolate Peanut Butter Cups are creamy, rich, and perfectly layered with smooth peanut butter filling and a crisp chocolate shell. Made with simple pantry ingredients, they’re quick to prepare, require no oven, and are a fresher, healthier alternative to store-bought treats.
Ingredients
Instructions
-
In a medium saucepan, melt peanut butter, butter, and brown sugar over low heat. Stir until smooth and sugar is dissolved. Remove from heat and mix in powdered sugar until thick and well combined. Set aside.
-
In a microwave-safe bowl, melt chocolate chips and coconut oil in 30-second intervals, stirring each time, until smooth.
-
Line a 12-cup muffin pan with paper liners. Spoon about 1 tbsp melted chocolate into each liner and spread evenly. Freeze for 10 minutes.
-
Add about 1 tbsp of peanut butter filling to each cup. Flatten gently so it forms an even layer.
-
Top with another 1 tbsp melted chocolate to fully cover the filling. Tap the tray lightly to smooth the tops.
-
Chill in the refrigerator or freezer until firm (30–40 minutes). Once set, peel off the liners and enjoy.