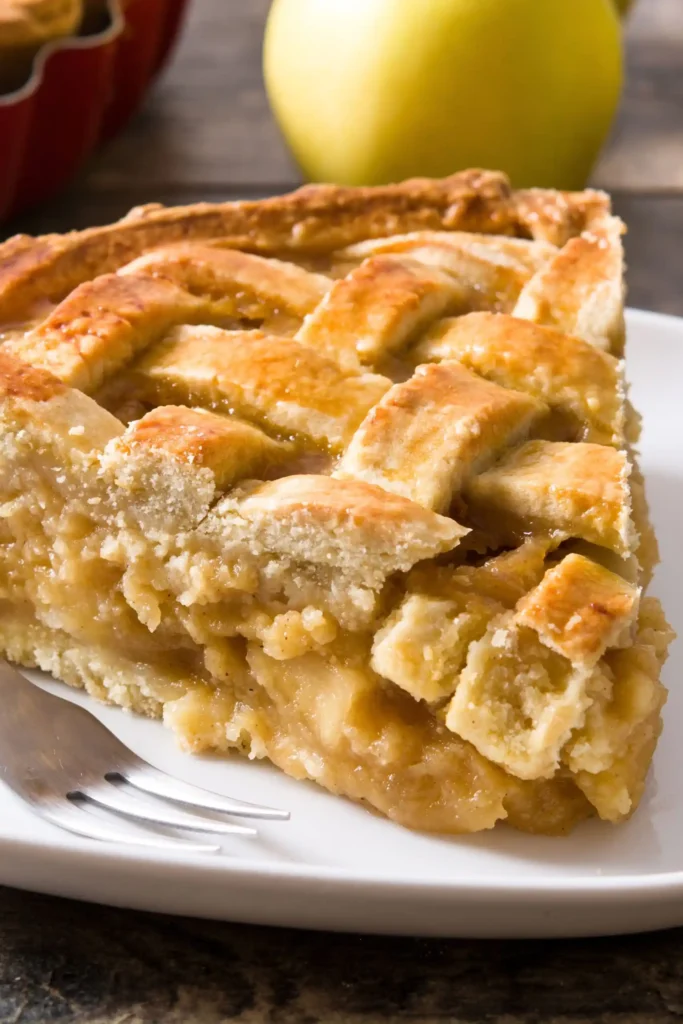
Apple pie known for its flaky crust and sweet, spiced apple filling, it is often prepared for gatherings, holidays, and weekend baking. This recipe gives you everything you need to create a delicious apple pie at home with simple ingredients and easy-to-follow steps. The combination of fresh apples, warm spices, and a golden crust creates a dessert that is both comforting and satisfying.
Making apple pie doesn’t have to be complicated. Whether you’re using homemade or store-bought pie crusts, the process is straightforward, and the result is always rewarding. With the right mix of apples, a touch of cinnamon and nutmeg, and a balance of sweetness and tartness, this recipe ensures your pie will be flavorful, well-textured, and appealing to everyone at the table.
Why You’ll Love This Pie
There are many reasons why this apple pie stands out as a dessert you’ll enjoy preparing and serving:
- Perfectly Balanced Flavor: The mix of tart and sweet apples combined with sugar, lemon juice, and spices creates a filling that isn’t overly sweet but rich and flavorful.
- Simple and Accessible Ingredients: Everything needed for this recipe can be found in most kitchens or local grocery stores. No hard-to-find items are required.
- Golden and Flaky Crust: With an egg wash and light sugar sprinkle, the crust comes out crisp, golden, and beautifully textured.
- Customizable Options: You can use your preferred apple varieties, add vanilla extract, or try a lattice crust for a different look.
- Great for Any Occasion: Whether it’s for family dinner, a special celebration, or a treat for yourself, this pie fits right in.
This recipe is not just about taste, but also about ease and reliability. It’s a trusted method for creating a pie that consistently turns out well and delivers the classic apple pie experience that many people look forward to enjoying.
Ingredients Needed
To prepare this delicious apple pie, you will need the following ingredients. Each plays a role in achieving the right balance of flavor and texture:
- 2 Pie Crusts (store-bought or homemade): These form the flaky and buttery base and top of the pie. A lattice or full cover can be used, depending on your preference.
- 6 Cups Thinly Sliced Apples: A mix of tart and sweet apples such as Granny Smith and Honeycrisp works best. Thin slices ensure even baking and a soft filling.
- 3/4 Cup Sugar: Provides sweetness and enhances the natural flavor of the apples.
- 2 Tablespoons Flour: Acts as a thickener to absorb juices released by the apples during baking, preventing the filling from becoming watery.
- 1 Teaspoon Cinnamon: Adds warmth and depth of flavor.
- 1/4 Teaspoon Nutmeg: Brings a subtle spice that complements the cinnamon.
- 1 Tablespoon Lemon Juice: Balances the sweetness and prevents the apples from turning brown.
- 2 Tablespoons Butter (cut into small pieces): Melts into the filling during baking, giving it a rich, smooth taste.
- 1 Egg (for egg wash): Beaten with a small amount of water, it gives the crust a golden, shiny finish.
- 1 Tablespoon Sugar (for sprinkling): Adds a slight crunch and enhances the appearance of the crust.
Optional additions:
- 1/2 Teaspoon Vanilla Extract: Adds a light aroma and extra flavor.
- Pinch of Salt: Helps balance sweetness and intensifies the flavors.
Step-by-Step Instructions
Follow these steps for a pie that bakes evenly and comes out beautifully every time:
Step 1: Prepare the Apples
- Peel, core, and slice the apples into thin, even pieces.
- Place the slices in a large mixing bowl.
- Toss with lemon juice to maintain freshness and add a hint of acidity.
Step 2: Make the Filling
- Add sugar, flour, cinnamon, and nutmeg to the apples.
- Mix until every slice is coated evenly. The flour will absorb extra juice and prevent the pie from being too liquid once baked.
Step 3: Prepare the Bottom Crust
- Roll out one pie crust and carefully fit it into a 9-inch pie dish.
- Press it gently into the corners of the dish without stretching. This prevents shrinkage during baking.
Step 4: Add the Apple Mixture
- Pour the coated apples into the prepared crust, spreading them out evenly.
- Dot the filling with small butter pieces to enhance richness and flavor.
Step 5: Cover with the Top Crust
- Roll out the second crust and place it over the filling.
- For a classic look, you can cover fully or cut strips to create a lattice pattern.
- Trim any excess dough and pinch or crimp the edges to seal.
- If using a full top crust, cut small slits to allow steam to escape while baking.
Step 6: Apply the Egg Wash
- Beat the egg with 1 tablespoon of water.
- Brush the mixture evenly over the crust. This helps achieve a golden-brown finish.
- Sprinkle 1 tablespoon of sugar on top for extra crispness and shine.
Step 7: Bake the Pie
- Preheat your oven to 425°F (220°C).
- Place the pie on the middle rack and bake for 45–50 minutes, until the crust is golden and the filling is bubbling.
- If the edges of the crust start browning too quickly, cover them with aluminum foil to prevent burning.
Step 8: Cooling
- Once baked, remove the pie from the oven and let it cool for at least 2 hours on a wire rack. This resting time allows the filling to set, making it easier to slice.
Serving & Notes
- Best apples: A mix of tart and sweet, such as Granny Smith and Honeycrisp.
- Storage: Refrigerate leftovers for up to 4 days.
- Reheat: Warm slices in the oven at 350°F (175°C) for 10 minutes.
- Freezing: Freeze unbaked pies for up to 3 months. Bake from frozen, adding 15–20 minutes to the cooking time.

Classic Delicious Apple Pie Recipe
Description
This homemade apple pie recipe combines a flaky crust with a perfectly balanced apple filling. Using a mix of tart and sweet apples, warm spices, and a golden buttery finish, it delivers the classic apple pie flavor that everyone loves. Ideal for holidays, gatherings, or weekend baking, this recipe is simple to prepare and always a crowd favorite.
Ingredients
Instructions
-
Preheat oven to 425°F (220°C).
-
Peel, core, and slice apples thinly. Toss with lemon juice in a large mixing bowl.
-
Add sugar, flour, cinnamon, and nutmeg to the apples. Mix until evenly coated.
-
Roll out the bottom crust and place it into a 9-inch pie dish.
-
Spoon the apple mixture into the crust and dot with butter pieces.
-
Cover with the second crust (lattice or full). Trim and seal the edges. If using a full top, cut slits to release steam.
-
Beat the egg with 1 tbsp water. Brush over the top crust and sprinkle with sugar.
-
Bake for 45–50 minutes, until crust is golden brown and filling is bubbling. Cover edges with foil if they brown too quickly.
-
Let the pie cool for at least 2 hours before slicing and serving.